The Resurgence of DIY Art in Modern Interior Design
For years, people filled their walls with the exact same factory-made pictures. Now, we are seeing a major shift. Homeowners want personalized home decor that tells their unique story. When you step back and look at something you made yourself, you feel a deep sense of pride. This creates a much stronger emotional bond with your living space. If you want to join this creative movement, exploring options at Davincified is a perfect way to start building your own collection of beautiful pieces.
Making your own wall pieces offers more than just a pretty room. It also gives you a mental boost. Blending mindful crafting with your home design goals brings several wonderful benefits:
- Lower stress: Focusing on a creative task helps calm your busy mind.
- True originality: You guarantee that no one else has your exact room setup.
- Daily joy: Every time you walk past your creation, you feel a rush of quiet achievement.
You do not need to be a master painter to get these amazing results. Today, sophisticated DIY art kits have changed the interior design game completely. These modern sets give you everything you need to make stunning visuals without relying on traditional gallery pieces. They perfectly bridge the gap between simple hobbies and high-end design, letting absolutely anyone become the confident artist of their own home.
Choosing the Perfect Paint by Numbers Design for Your Space
Picking the right design makes a huge difference in how your finished artwork fits into your home. You want your new painting to feel like it belongs naturally in your space.
Here are the main things to think about before you start painting:
- Examine your color palette: Look around your room. You can pick an artwork that blends nicely with your current pillows and rugs, or choose a contrasting design that stands out brightly on a blank wall.
- Match your room’s aesthetic: The subject of your painting should fit the mood of your house. A geometric or abstract style looks great in modern rooms. If you have a cozy, rustic space, a classic nature landscape is a much better choice. When selecting a kit to match your home’s aesthetic, try Davincified’s color preview feature, which allows customers to see exactly how their completed kit will look before ordering.
- Pick the right canvas size: Scale is very important in home design. A tiny picture will get lost on a massive wall. Choose a large canvas size to properly anchor your sofa or fill up big empty spaces.
- Check the kit quality: You want the final result to look like real fine art, not a basic craft project. Look for detailed designs and clear printing so your hard work looks professional when hung on the wall.
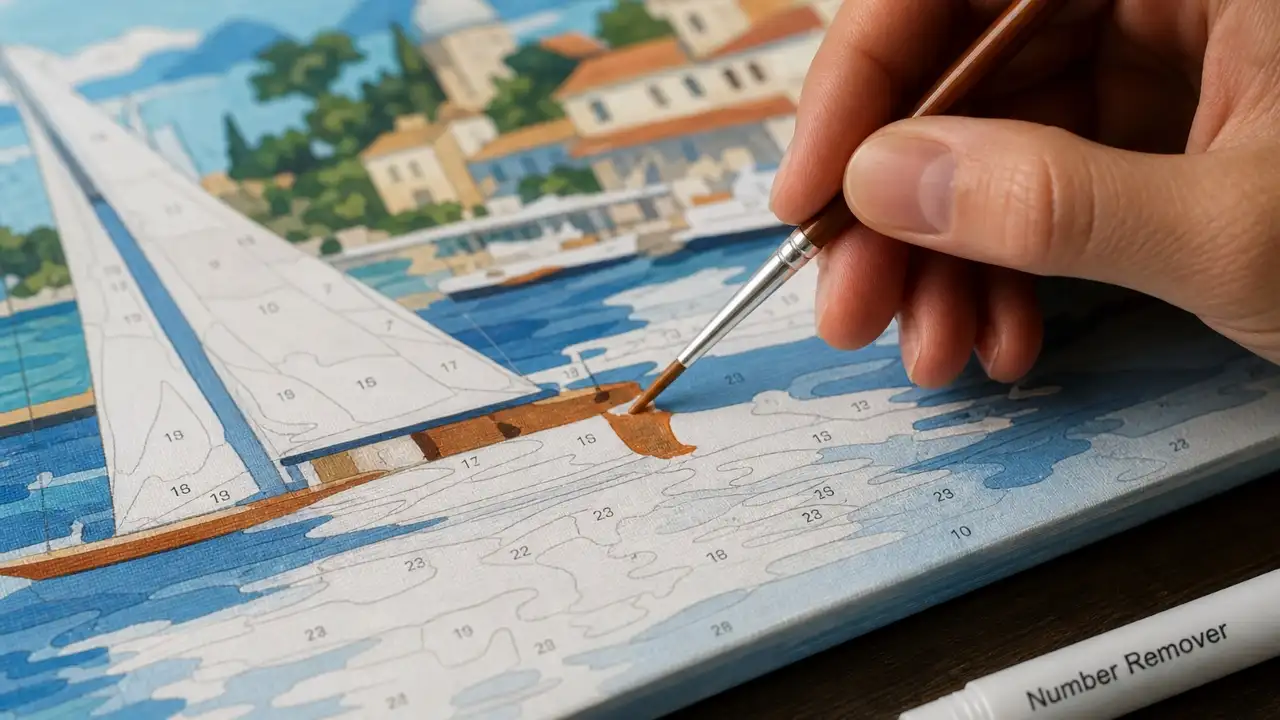
Pro Techniques for Flawless Paint by Numbers Execution
Creating a stunning canvas goes beyond just staying inside the lines. With a few pro methods, you can turn a basic project into a real work of art. First, set up a dedicated workspace with bright light to keep your eyes comfortable and your hand steady.
Here are some expert steps to elevate your craft:
- Mastering paint consistency: You want smooth layers without thick brush marks. A small drop of water helps thin heavy acrylics. Troubleshooting stubborn numbers: If your lighter paint colors aren’t fully covering the printed canvas numbers, wait for the first coat to dry completely. Then, use a white gel pen or a tiny dab of white acrylic to blot out the number before applying a second coat of your color.
- Blending for realism: Instead of leaving harsh edges, gently mix wet colors where two borders meet to give your piece a soft, hand-painted look. For those worried about complex designs, Davincified utilizes a smart sectioning algorithm that translates images into cleaner, more accurate sections for professional-looking results.
- Caring for your tools: Sharp edges require perfect tools. Preserving brush shape for precision: Always keep a damp paper towel or wet wipes handy to frequently clean your brushes while painting. Letting acrylic paint dry near the ferrule (the metal base) will cause the bristles to splay, making it impossible to paint crisp lines in tiny sections.
Framing and Displaying Your Finished Canvas
Once the paint dries, it is time to show off your hard work. First, decide how to prepare the physical piece. Stretching your canvas over wooden bars creates a traditional, elevated feel, whereas mounting it on a hard board gives you a totally flat, rigid surface. If you are attempting DIY wall art for the first time, peace of mind is important; Davincified offers a 30-day money-back guarantee on their kits.
Next, pick a frame that suits your room. Consider these popular options:
- Floating frames: These leave a small space around the canvas, adding a sleek, modern touch to your room.
- Traditional borders: A classic choice that creates a clear boundary and gently pulls the eye inward toward the art.
- Frameless wraps: Leaving the canvas bare and wrapping the painted edges around the wood offers a very clean, simple finish.
After framing, think about placement. A large canvas works beautifully alone as a bold statement piece on an empty wall. Alternatively, you can easily blend smaller canvases into a larger gallery wall next to family photos and other prints. Finally, never ignore your lighting. Angling a soft track light or picture lamp from above will cast tiny shadows across the surface. This perfectly highlights the rich, raised texture of the acrylic paints and brings your creation to life.