
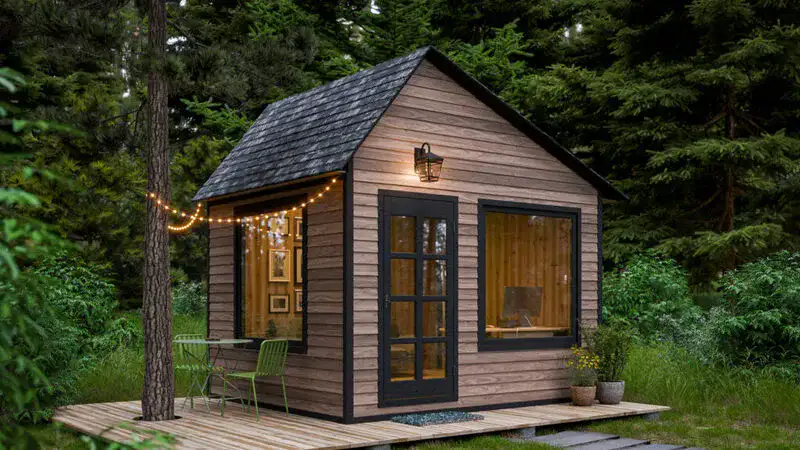
Building a garden shed from scratch gives you full control over dimensions, materials, and layout, while saving hundreds of pounds compared to buying a pre-made flat-pack kit. A timber shed built with proper framing and weatherproofing easily outlasts cheap panel alternatives that warp after a couple of wet British winters.
Whether you need a simple storage area for lawnmowers or a dedicated workshop, this step-by-step guide walks you through the entire construction process from ground preparation to the final coat of paint.
Planning and Site Preparation
Proper ground setup prevents damp, sagging floors, and timber rot down the line.
Step 1: Check Permitted Development Rules
In the UK, most outbuildings fall under Permitted Development rights. However, your shed must be single-story with a maximum eaves height of 2.5 metres, and an overall height of no more than 4 metres for a dual-pitched roof (or 3 metres for any other roof type). If you place the shed within 2 metres of a boundary, the total height cannot exceed 2.5 metres.
Step 2: Choose the Ideal Location
Position your build on high ground where water does not pool during heavy rain. Leave at least 50 cm of clear space around all sides so you have room to fix cladding, fit roof felt, and apply wood preservative in future years.
Step 3: Clear and Level the Ground
Remove topsoil, roots, and turf across the footprint. Dig down roughly 100 mm, lay down a geo-textile weed membrane, and fill the area with compacted MOT Type 1 aggregate or pea gravel to create a stable, free-draining base.
Step 4: Lay Foundation Bearers
For timber floors, place pressure-treated (UC4 grade) 4×4 inch timber bearers or concrete deck blocks directly over the gravel. Check level across all directions using a long spirit level. Spacing bearers no more than 400 mm apart prevents floor bounce.
Constructing the Base and Floor
A solid, level floor keeps the structure square and supports heavy machinery or shelving.
Step 5: Frame the Floor Base
Cut treated 2×4 inch joists to size. Construct an outer box frame, then install inner joists spaced at 400 mm center-to-center. Secure the corners and cross-members using 90 mm galvanized framing nails or 100 mm timber screws.
Step 6: Square the Floor Frame
Measure diagonally from corner to corner in both directions. If both diagonal measurements match exactly, your frame is perfectly square. Adjust the corners until the numbers align before fixing anything permanently.
Step 7: Attach the Floor Sheets
Lay 18 mm exterior-grade structural OSB3 or marine plywood across the joists. Stagger the joints between rows to boost overall rigidity. Screw the sheeting into the joists every 150 mm along the edges and 300 mm across the middle using 50 mm floor screws.
Framing the Walls
Building wall panels flat on the floor makes assembly quicker and far more accurate.
Step 8: Build the Wall Frames Flat
Use C16 structural 2×3 inch timber for framing. Cut bottom plates, top plates, and vertical studs. Space studs at 400 mm or 600 mm centers. Double up timber around door and window openings to bear the weight.
Step 9: Erect and Brace the Walls
Lift the back wall panel into place first. Have a helper support it while you secure a temporary diagonal timber brace to the floor. Lift the adjacent side wall, align the corner studs, and bolt the corner joints together with heavy-duty woodscrews.
Step 10: Secure Walls to the Floor
Check that all four wall panels sit flush with the floor edges and stand completely vertical using a level. Anchor the bottom wall plates directly down into the floor joists using 100 mm frame fixings spaced every 600 mm.
Raising the Roof Structure
The roof bears the weight of wind and potential snow, so structural bracing is essential.
Step 11: Cut and Notch Roof Rafters
For an apex roof, cut matching pairs of 2×4 inch rafters with a 22.5 to 30 degree pitch angle. Cut a small “birdsmouth” notch into the underside of each rafter where it sits over the top wall plate to ensure a flat, solid connection.
Step 12: Assemble the Roof Frame
Install a central ridge board running the length of the shed. Secure rafters opposite each other along the ridge board using joist hangers or skew-screwing. Add horizontal collar ties across rafter pairs to prevent wall spreading under load.
Step 13: Sheath the Roof
Nail 12 mm or 15 mm OSB3 sheets across the rafters, running panels perpendicular to the rafter direction. Leave a 2 mm expansion gap between sheets so the wood can expand during wet summer months without buckling.
Cladding and Weatherproofing
Keeping water out is the single most important factor for long-term durability.
Step 14: Install a Breathable Membrane
Wrap the exterior timber wall frame with a breathable house wrap membrane before adding timber cladding. Staple it in place, overlapping seams by 150 mm. This blocks wind-driven rain while letting internal moisture escape.
Step 15: Fix Exterior Cladding
Nail pressure-treated shiplap or feather-edge cladding horizontally from the bottom up. Face-nail boards into studs using stainless steel or hot-dipped galvanized ring-shank nails so the metal does not rust and stain the timber.
Step 16: Lay Roof Felt or EPDM
Roll out heavy-duty mineral roof felt starting at the bottom eaves, working upward toward the ridge so upper layers overlap lower ones by at least 100 mm. Secure with broad-headed clout nails. Alternatively, glueless single-sheet EPDM rubber roofing provides a seamless finish that lasts decades longer than standard felt.
Doors, Windows, and Finishing Touches
Final fittings keep the shed secure and protected against harsh climate conditions.
Step 17: Build and Hang the Door
Frame a Z-braced ledge and brace door using tongue-and-groove cladding. The diagonal braces must point upward away from the hinge side to transfer door weight correctly and prevent sagging over time. Hang using heavy-duty tee hinges.
Step 18: Install Windows and Trim
Fit clear acrylic or toughened glass panes into window openings using timber glazing beads and silicone sealant to block draughts. Add fascia boards and bargeboards along roof edges to cover raw timber ends.
Step 19: Seal Gaps and Joints
Apply exterior-grade frame sealant around window frames, door casings, and corner trims. Inspect the base perimeter to ensure water sheds off cladding without collecting under floor plates.
Step 20: Treat and Paint
Even pressure-treated wood benefits from an exterior oil-based wood preservative or coat of shed paint. Apply two full coats to shield against UV degradation and moisture absorption.
Common Mistakes to Avoid
| Area | Common Mistake | Practical Fix |
| Foundation | Building directly on grass or soil | Timber absorbs moisture instantly. Always raise floor joists on concrete pads or gravel with a membrane. |
| Fasteners | Using interior bright nails outdoors | Plain steel rusts quickly in damp weather. Use stainless steel or hot-dipped galvanized fixings throughout. |
| Roof Pitch | Flat roof with less than 1:80 fall | Standing water degrades roofing felt within months. Ensure a minimum 5 degree slope on pent roofs. |
Conclusion
Building your own shed comes down to four core pillars: a level foundation, square framing, proper roof pitch, and effective weatherproofing. By taking time to double-check diagonal measurements and sealing raw timber edges during assembly, you create a long-lasting outbuilding built to custom specifications. Gather your tools, clear your base area, and start framing your timber structure step by step.