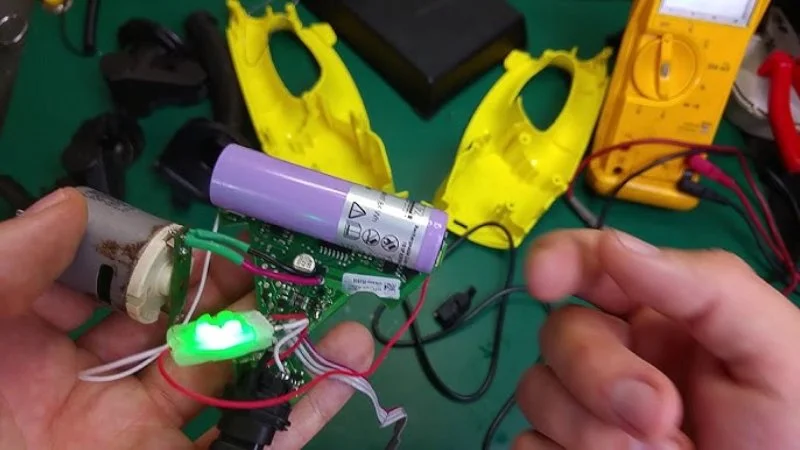
Imagine being halfway through cleaning your windows with your trusted Kärcher Window Vac, only to discover it won’t charge. Frustrating, right? You’re not alone charging issues are among the most common problems reported by Kärcher Window Vac users. With millions of these devices sold worldwide, it’s no surprise that some encounter battery or charging troubles over time. If your Karcher Window Vac not charging, it could stem from a variety of issues, ranging from a simple connection problem to a worn-out battery.
In this guide, we’ll dive straight into the common causes and offer practical solutions to get your device back in action. Let’s troubleshoot!
Why Is Karcher Window Vac Not Charging?
Charging problems with the Karcher Window Vac can arise for several reasons, ranging from simple wear and tear to technical malfunctions. When your Karcher Window Vac not charging, it could be due to several reasons. Below are the most common reasons:
- Faulty Charging Cable or Adapter
The charging cable or adapter may be damaged due to regular use, storage issues, or manufacturing defects. A broken wire or loose connection can prevent the device from charging. - Dirty or Blocked Charging Port
Dirt, lint, or debris can accumulate in the charging port, disrupting the connection between the charger and the device. - Battery Issues
The Kärcher Window Vac uses a rechargeable lithium-ion battery, which can degrade over time. If the battery is old or defective, it may no longer hold a charge. - Overheating Protection Mode
Overuse or charging immediately after use can cause the device to overheat, activating its built-in safety mechanism to temporarily disable charging. - Internal Malfunction
Internal issues, such as a damaged circuit board or software glitch, can also lead to charging problems.
Troubleshooting Your Karcher Window Vac Not Charging
Follow these troubleshooting steps to diagnose and resolve charging issues:
1. Inspect the Charging Cable and Adapter
- Examine the charging cable and adapter for visible damage, such as fraying, bent plugs, or exposed wires.
- Test the charger with another compatible device to see if it works.
- If the charger is faulty, replace it with an original Kärcher charger for best results.
2. Clean the Charging Port
- Use a soft, dry brush, a toothpick, or compressed air to remove any dust, lint, or debris from the charging port.
- Be careful not to damage the pins inside the port. Avoid using water or cleaning solutions.
3. Check the Battery Health
- If your Karcher Window Vac is over two years old, the battery might have degraded and need replacement.
- Contact Kärcher customer service to inquire about a battery replacement. Attempting to replace it yourself may void the warranty.
4. Let the Device Cool Down
- If the device has been in heavy use, it may overheat and stop charging temporarily.
- Allow the Window Vac to cool for 30-60 minutes before plugging it in to charge.
5. Reset the Device
- Resetting can sometimes resolve software glitches.
- Disconnect the charger, press and hold the power button for 10-15 seconds, and then reconnect the charger.
6. Try a Different Charger
- Test the device with another compatible Kärcher charger to rule out issues with the original adapter.
When to Seek Professional Help
If none of these steps resolve the issue, it might be time to seek professional assistance. Here’s when to contact Kärcher support or visit an authorized repair center:
- The device remains unresponsive after troubleshooting.
- You notice physical damage to internal components.
- The battery requires replacement.
If your Kärcher Window Vac is still under warranty, repairs or replacements may be covered at no additional cost.
Tips to Prevent Charging Issues
To ensure your Kärcher Window Vac continues to function optimally, follow these preventive measures:
- Handle Charging Equipment Carefully
- Avoid pulling or bending the charging cable unnecessarily. Store the charger in a safe, dry place when not in use.
- Regularly Clean the Charging Port
- Keep the charging port clean to prevent dirt or debris from interfering with the connection.
- Use Original Accessories
- Always use Kärcher-approved chargers and batteries to ensure safety and compatibility.
- Avoid Overheating
- Let the device cool down after extended use before charging. Avoid exposing it to direct sunlight or extreme temperatures.
- Charge Properly
- Follow Kärcher’s charging instructions. Avoid overcharging or depleting the battery completely, as these practices can reduce battery life.
Conclusion
When faced with the issue of your Karcher Window Vac not charging, a systematic approach to troubleshooting can often resolve the problem. Begin by inspecting the charger, cleaning the port, and testing the battery. If these steps don’t work, professional repair may be required. By following proper maintenance practices and handling the device with care, you can extend its lifespan and minimize the risk of charging problems. The Kärcher Window Vac is a reliable tool, and with regular upkeep, it can continue to provide streak-free results for years to come.


Your article helped me a lot, is there any more related content? Thanks! https://accounts.binance.com/pl/register-person?ref=UM6SMJM3